Peer-to-peer Live Sync
Usage Scenarios
Section titled “Usage Scenarios”- Need an extreme real-time synchronization experience.
- Need multi-user real-time content sharing.
NOTELive Sync is a Professional feature. You cannot fill in a room and join collaboration without unlocking it.
How to Configure
Section titled “How to Configure”In Settings → Sync, expand the “N” P2P Hot Sync section and follow these steps:
- Room Name: Enter a room ID. Leave blank to use the vault name by default. Devices in the same room can sync notes with each other.
- Room Password (optional): Set a password; devices joining the same room must use the same password.
- Nickname: Set the name shown for this device in the room.
- Connection Mode: Choose
Direct P2PorRelay. - Click Enter to start the real-time collaboration engine and sync with other devices in the room.
TIPAfter multiple devices join the same room (with the same password), they will appear in the collaboration view.
Direct P2P
Section titled “Direct P2P”Devices establish a peer-to-peer connection over WebRTC; a signaling server is only needed to set up the connection. Choose the Service Provider:
| Provider | Use Case |
|---|---|
| Websocket (standard) | Default standard mode |
| Cloudflare (do) | Suitable for specific network environments |
| Aliyun (fc) | Recommended for networks in mainland China |
Devices on the same LAN usually connect directly; across networks the plugin automatically attempts NAT traversal, and you can configure a TURN server if needed.
Devices exchange data through a cloud Worker relay, suitable for cross-network scenarios or when direct connection fails (e.g., strict NAT):
- Relay URL: Defaults to
https://relay.sync-vault.com/relay, provided and maintained by Sync Vault. You can also self-host one. - Relay Token (optional): Must match if your self-hosted Worker has
RELAY_SHARED_TOKENconfigured.
NOTEIn Relay mode, all devices in the room connect automatically—no manual per-device connect/disconnect is needed.
Collaboration View
Section titled “Collaboration View”Open the dashboard (click the cloud icon in the sidebar) and switch to the Collaboration tab; on mobile, you can also tap the 👥 icon in the Obsidian sidebar to open it directly.
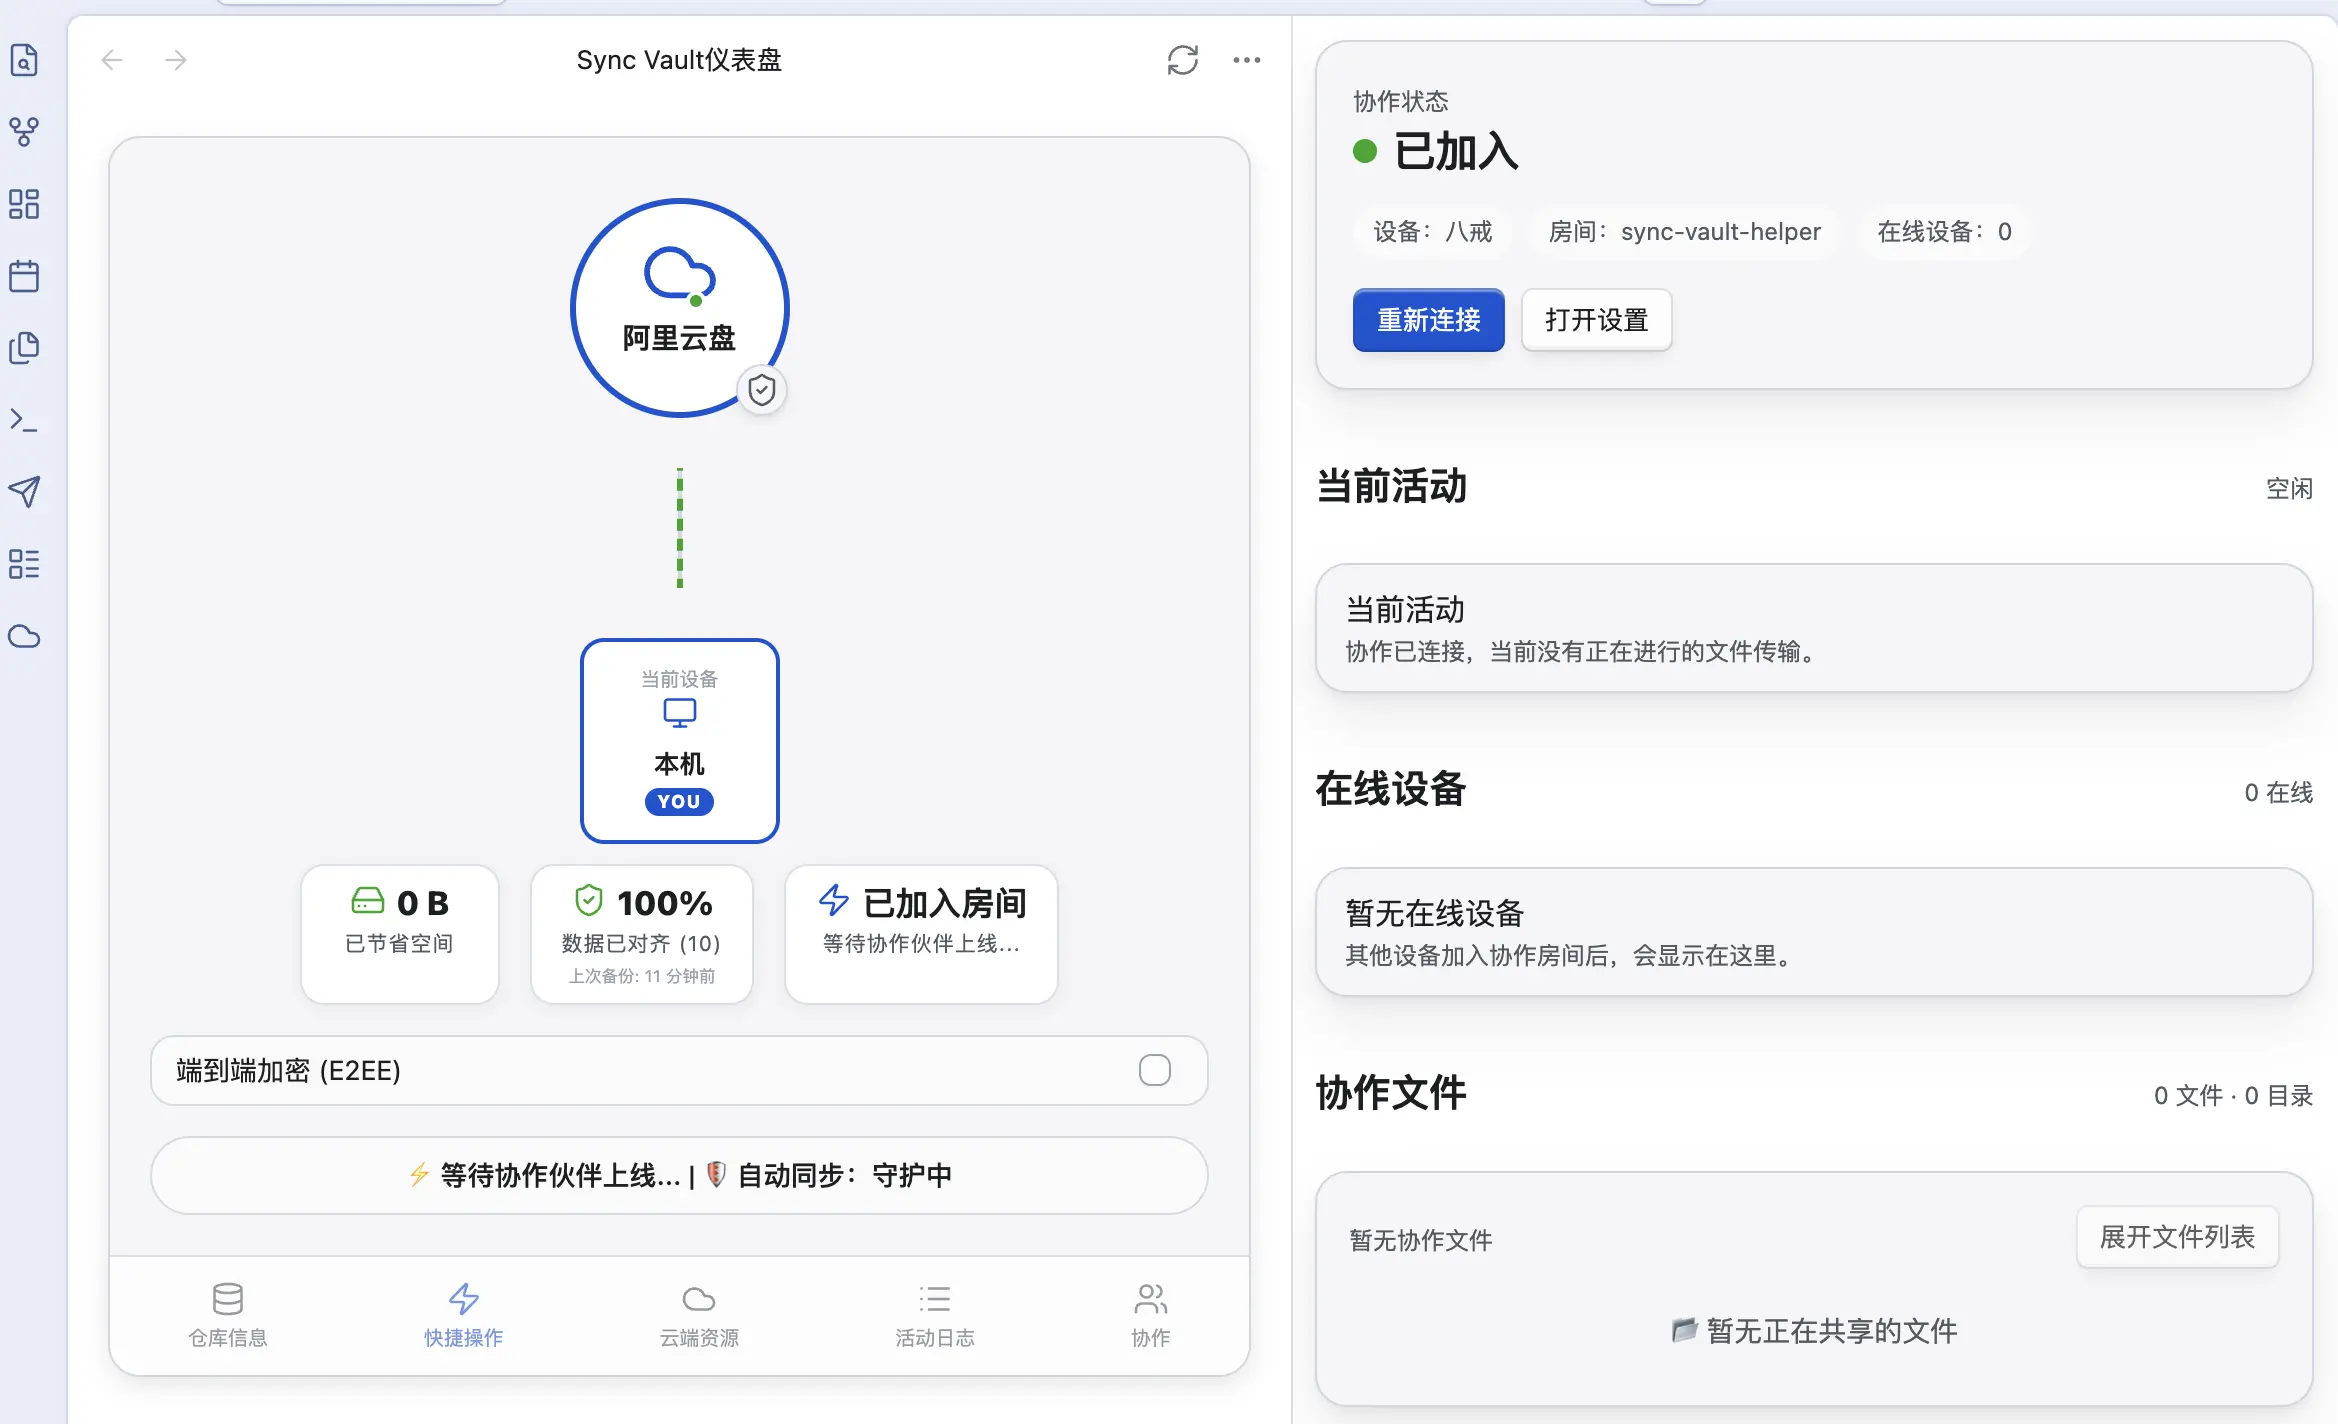
The collaboration view provides:
- Collaboration status: current device, room, and the number of online devices.
- Online devices: lists devices in the room; in P2P mode you can connect / disconnect individual devices (Relay mode connects automatically).
- Current activity: shows in-progress file transfers and their progress.
- Collaborated files: lists shared files, where you can set individual files to Writable / Read-only.
The topology diagram at the top of the dashboard also shows the live connection between this device and peers in real time; the status bar shows 🔥 Live Collab Active (N connected) or ⚡ Waiting for peers....
Self-hosting
Section titled “Self-hosting”Self-host a Signaling Server
Section titled “Self-host a Signaling Server”You need a machine reachable from the public internet (e.g., a cloud server). The signaling server only exchanges connection information—file contents never pass through it.
git clone git@github.com:abcamus/webrtc-signaling-server.gitcd webrtc-signaling-servernpm run docker:buildnpm run docker:runAfter deployment, enter ws://your-server:1234 in Self-hosted Configuration → Signaling Server Address and rejoin the room to take effect.
Self-host a TURN Server
Section titled “Self-host a TURN Server”When direct P2P fails due to NAT restrictions, configure a TURN server to relay. Enter it in Self-hosted Configuration → TURN Server, in the format:
turn:host:port?username=xxx&password=xxxSelf-host a Relay Worker
Section titled “Self-host a Relay Worker”The Relay is a Cloudflare Worker that forwards data between devices. You can implement your own Worker following the built-in Relay URL: point Relay URL at your Worker and set a Relay Token if needed.